Okay, it’s not as fancy as some of the huge shops you see online with 1,000’s of dollars worth of equipment, but it works for me. I was a little reluctant to post pictures because I did not want to seem like I was bragging. Through honestly I am pretty proud how it’s turning out. I wanted to post pictures to give others ideas for their own shop, I’ve found so many ideas online myself. It is also a work in progress, still lots I want to do. And many things will get fixed up in the near future. Looking preddy is lower on the priority list right now.
Also, even though it might not look like it, I am getting more organized by the day. Much better than it use to be. As for my space, I’ve taken over about 2/3’s of a two stall garage. Since I don’t have unlimited space, I’ve tried to be as creative as possible and make everything as multi-function as possible.
The Pride And Joy
The cart I recently built for my table saw and router table. Built a cart with casters, mounted my R4512 Ridgid table saw, along with the Incra LS TS/RT combination. Love, love, love the Incra system. Once I zero out to the saw blade or the router bit, it’s deadly accurate. Same cut every single time. They claim repeatable as one of their features and they are so right.
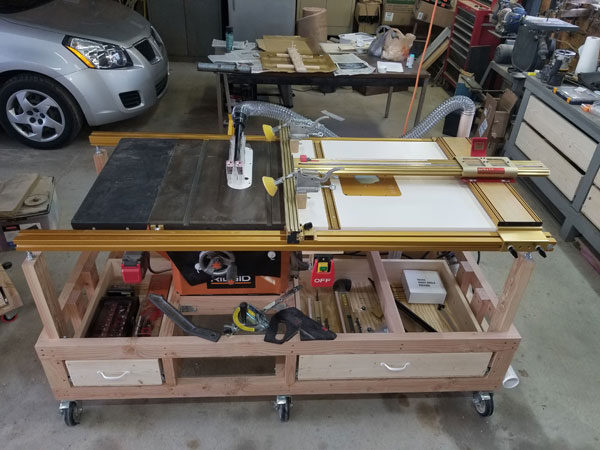
While the dust collection looks a little messy, it works quite well. I also put in a two blast gates, one for the table saw dust collection and another one for the router table dust collection. Plus each set has two parts, one of the top of the tool and the other for the bottom of the tool.

Miter Saw Station
Before I built this unit, I was using an old Makita 10″ Chop Saw that I would have to lug onto a beat up old office table to use it. If I needed to make repeat cuts, I had to do a make-shift 2×4 set up and screw down a hunk of 1X to have a stop. It worked but it wasn’t ideal. Since I use the Miter saw more than any tool, a dedicated bench was badly needed, hence the creation. And it’s SO NICE to have a Miter saw that is always ready to use.
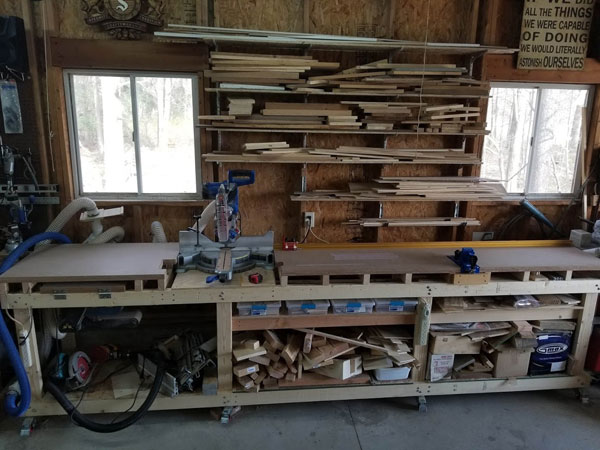
The Old Makita chop saw server me well and cut perfect miters, but it was so limited. Couldn’t cut very wide material. So it was a good excuse to get a new saw. I chose the Kolbalt 12″ Double Bevel Sliding Compound Miter Saw. While it’s great to have the cutting capacity, not to mention the compound cutting features, the jury is still out on this particular saw. Read the review I posted if you want to know more. When I first built the bench, it was for an old craftsman radial arm saw, so I had to jack up the table to get it to work. Future plans are to build a butcher block top for it. Again, low on the priority list.
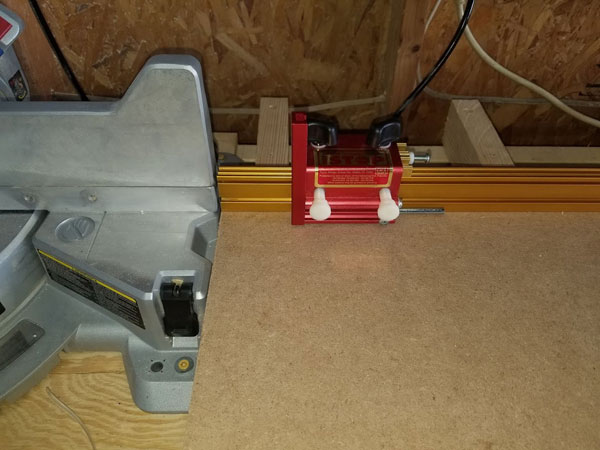
Also when I first built it, I made a MDF tall fence and I set a t-track into the fence. Obviously the track was for so I had the ability to have a stop and it worked well. But, when I ordered the Incra system for the table saw, I also ordered some of the fence track and finally (just today actually) replaced my old fence with the incra fence. The gold part. I also ordered their shop stop and it’s a fantastic setup now, though I am still learning how to use it.
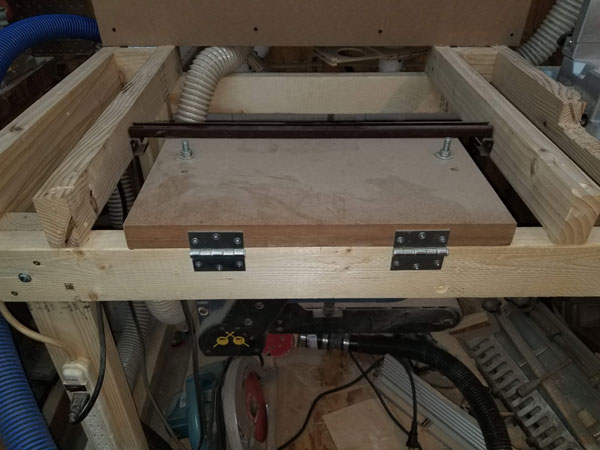
Since the miter saw bench takes up so much room, I tried to make it multi-function as well. I came up with the idea to mount my Ryobi Sander under the the left side of the saw. It’s a little cobbled as I used what I happened to have on hand, but it does work quite well and it stows away when not in use. The sander is mounted to a piece of MDF that is hinged. Right now I have a 2X4 to support it when it’s out. The sander is pretty heavy, so finding another way to hold it up might be difficult. The 2X4 works for now.

But that’s not all… I also added the Kreg K5 pocket hole jig into the bench top. Though it might look a little odd, it works quite well there. I have plenty of space for material and I also ran a dust collection hose to suck up the chips.
Drill Press
I’ve had the Craftsman drill for some years and never did much with the table. So a usable “woodworking” table was in order. It’s nothing fancy but it serves a purpose. When I first built it, I mounted two t-tracks and a tall metal fence. Can you guess where I messed up? Yep, a tall fence doesn’t work well on a drill press, it get’s in the way pretty much all the time. So I came across the Woodpeckers drill press table hardware kit and it looked perfect. I don’t buy much from the company because everything is pretty pricey, but this set up was reasonable at about $60. It comes with two t-tracks and a short fence, all with scales on them.
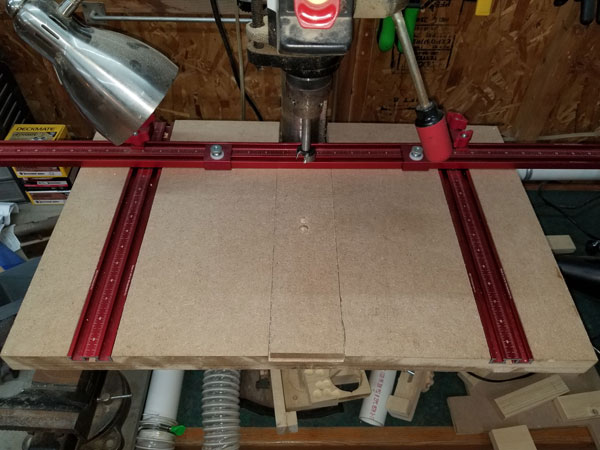
I really like the hardware, like all their stuff, it’s heavy duty and I am sure it’s going to last me a long time. Only odd thing, while it’s all heavy duty, the knobs are plastic. Not a big deal, just odd. Or it’s just me. Also, the center section of the drill press table is lose, it is sacrificial, and can be replaced as it’s worn down. I also made like 6 replacements. Some day I might dress it up.
Scroll Saw
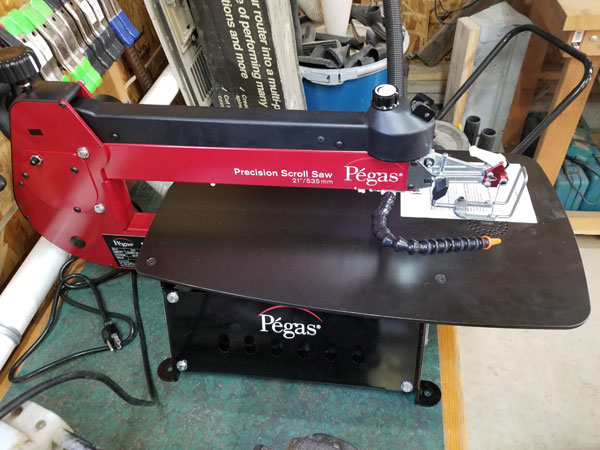
Scrolling has always been one of my favorite past times. Sadly the Delta Scroll Saw I had for years vibrated so much and was so noisy that it just wasn’t fun to use. And we know what happens when a tool is not fun to use… we don’t use it as much. I’ve been dreaming about a new scroll saw for some time and it just so happens a few months ago, a new one was coming on the market, the Pegas saw. While it was a “new” saw, the saw it self is actually made by the same factory with the same parts as the Excalibur and King. Basically the same saw with a different name on it.
All I can say is I LOVE this saw. It’s SO quiet and it cuts so well. It is a dream. Plus it comes with the Pegas chuck that makes it even better. Not to mention it had a introductory price. Took a while to get (like a month), but so worth the wait. It’s so smooth, the table is fantastic.
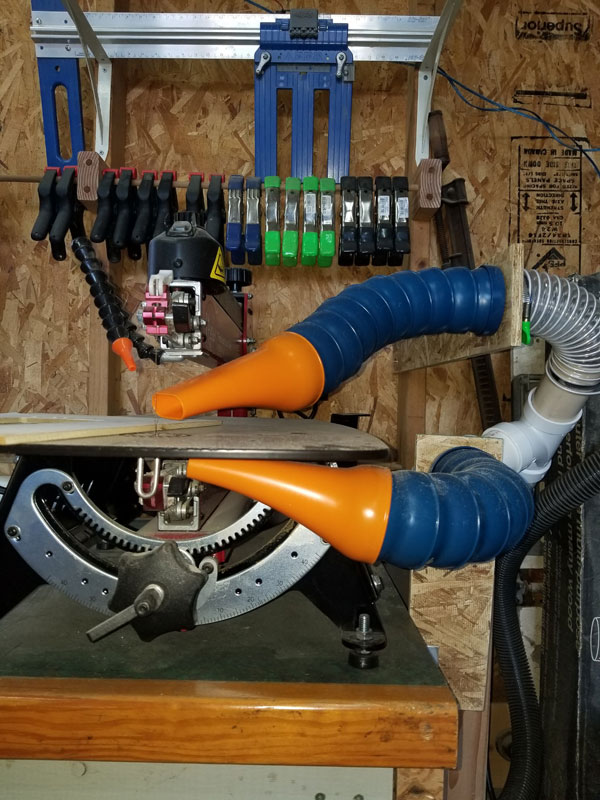
The only thing that I did not like about the new scroll saw was the dust collection. It might have seemed like a good idea, but it was clearly NOT tested. So, I rigged up a system that might not be pretty, but works very well. You can read more about it here: Loc-Line Dust Collection Kit.
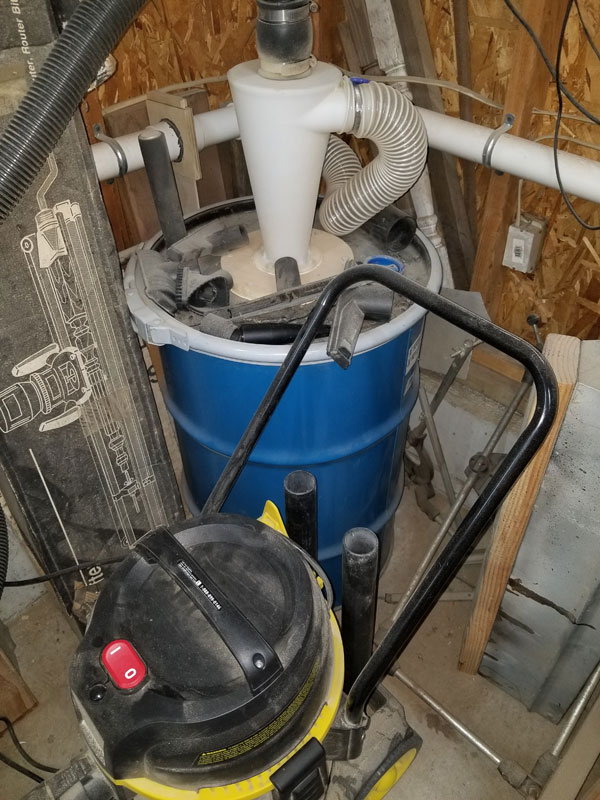
Dust Collection
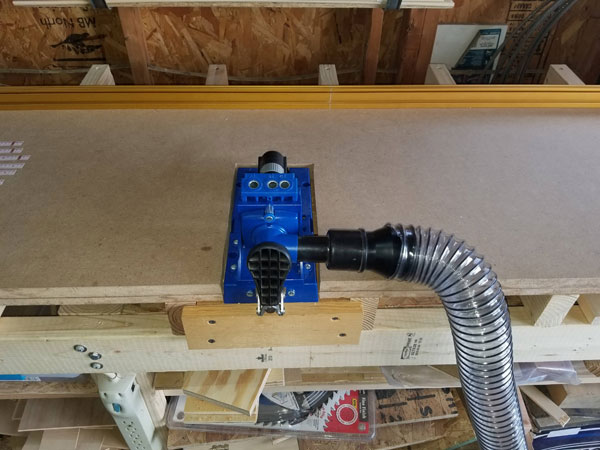
If you do woodworking and you don’t have dust collection you are just asking for trouble. Well, something like that. Anyways, I learned online that you could have a dust collection system powered by a shop vacuum, and it works surprising well. My system is powered by a Stanley 8 Gallon 6 Horse Power Stainless Steel Wet/Dry Vacuum. I also have a low cost Cyclone Dust Separator to keep the dust out of the shop vac. The cyclone separator is so worth the low price because the shop vacs get clogged up so fast when it comes to saw dust, and when it gets clogged you lose suction. The system is all 2″ PVC with 2-1/2″ hoses running to each tool and blast gates for each tool. I’ve even been adding blast gates on the main lines so I can cut down runs even more and hopefully gain more suction.
Here is the heart of Dust Collection the system:
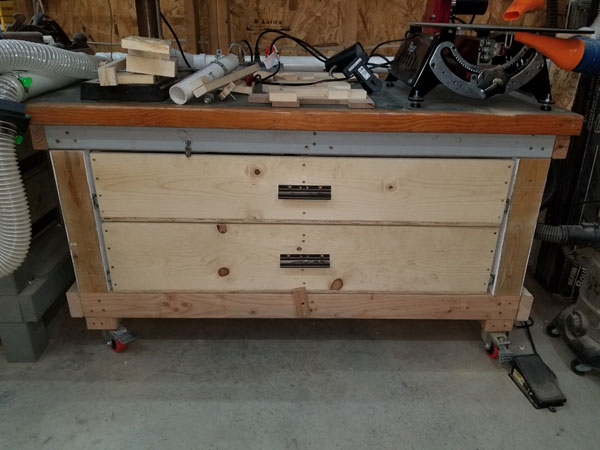
Tool Bench
A bench I built several moths ago to hold the drill press and the scroll saw. Like everything I build lately, it’s on casters for mobility and drawers for storage. You can never have enough drawers, right? Here again, some day soon I’ll fix it up with drawer fronts and I have a cool idea for handles.
Top drawer is for drill press related stuff, drill bits and more. Plus I made trays that slide back and forth to get more use out of the space. The are just 1/2″ pine with 1/4 pine dividers. And the sliding trays are completely glued together, today’s glue is amazing. I prefer the Titebond III Ultimate Wood Glue because it gives me a little time to get things in the right place before it sets.

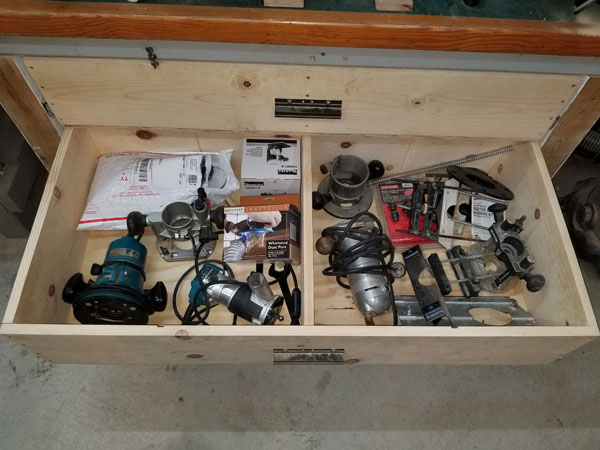
Bottom drawer is for routers and all the stuff for routers. Though I am starting to run out of room, might have to think of bigger router storage space. Add it to the to-do list.
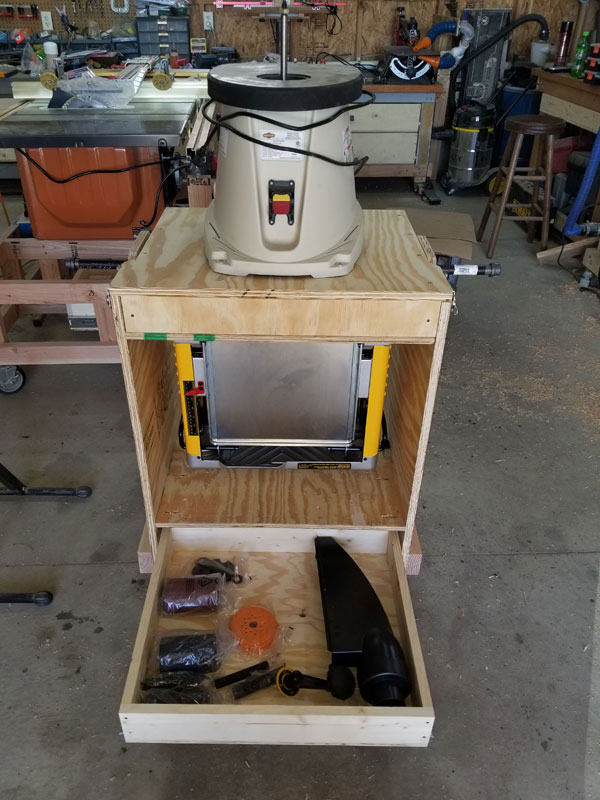
Flip Top Tool Cart
My latest creation, a tool cart with a flip top. Like I’ve said, I have limited space so to make the most of it, this cart was a great solution. I’ve been looking at different carts for some time and I liked this one the best. I mounted the planer and the spindle sander. Plus there is a drawer at the bottom to store the accessories for both tools.

More about the cart here: DIY Flip Top Woodworking Power Tool Cart.
The Future
Next project is an Out-feed/Assembly Table for the back of the table saw cart. Plans are to have the Kreg Clamp Track for putting together face frames and the assembly table will have all kinds of Dog Holes. But that could change. And the top will be butcher block I make from 2X4’s (actually practice for future kitchen counter tops).
I hope to add another smaller router table on the left side of the table saw cart with another router. Two is better than one, right? In reality, some things on the router table, like coping door rails is easier from the side, which is not as easy on my current table. And some times I just like routing from the side.
Okay, that’s it for now and I am tired, time for bed. Will post more as soon as I can.
What kind of shop do you have? Love hearing and seeing what others are doing. Speak up in the comments section below.